Build a checklist
Tell staff what to photograph, and Passvu what good looks like.
A checklist (a template in the app) has three parts:
- Sections group the store into areas.
- Photo spots (capture points) are the photos staff take.
- Questions are what Passvu checks in each photo.
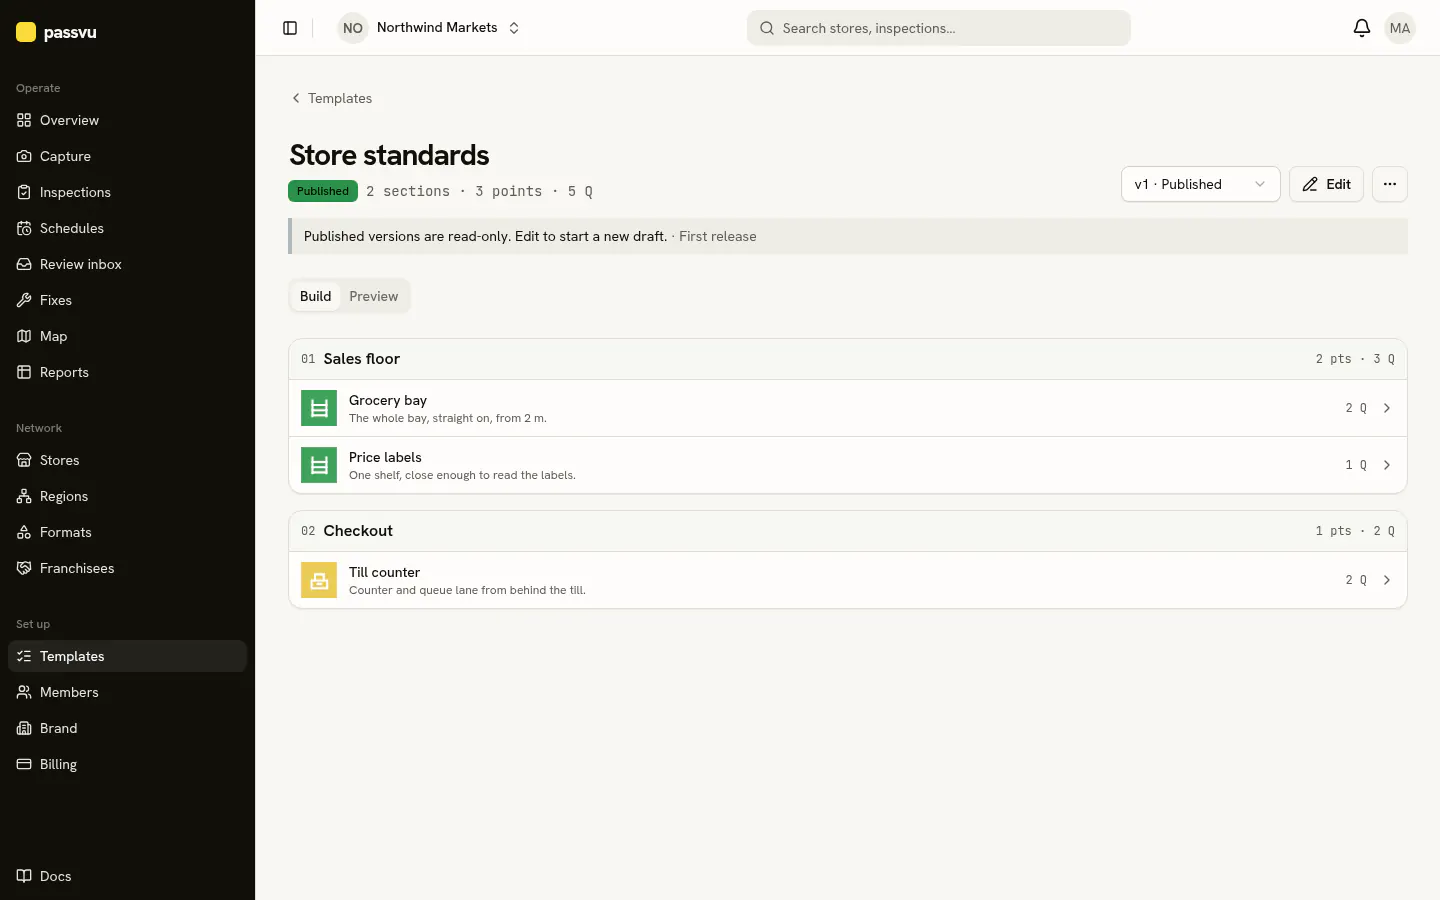
- 1Draft or live
- 2Preview it for each store type
- 3Sections, in order
- 4Open a photo spot to edit it
Start from the ready-made checklist
Go to Templates → Use starter template. You get storefront, sales floor, checkout and safety. Delete what you don't need.
Set up each photo spot
Write one short line on what to shoot, like "The whole bay, straight on, from 2 m." Add a photo of how it should look.
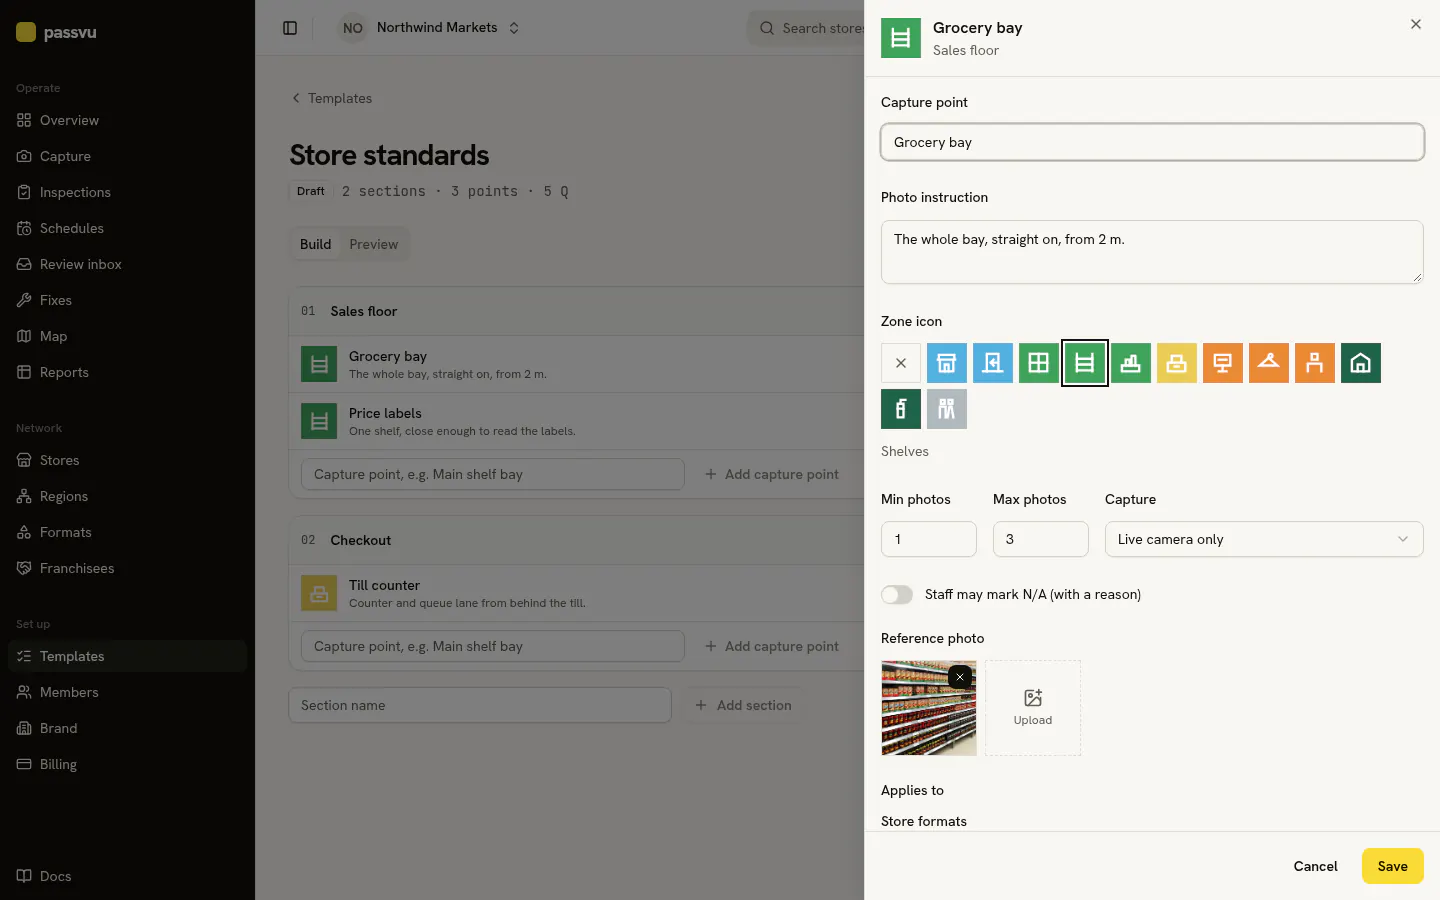
- 1An icon staff will recognise
- 2Example photo: how it should look
- 3Only for some store types (optional)
Ask clear questions
Ask about the photo the way you'd ask a person. One thing per question.
Choose how serious each item is
Critical fails the whole inspection. Major and minor lower the score and give the store more time to fix.
Preview and publish
Use Preview to see what each store type gets. Then Publish. You can keep editing later; new inspections pick up the new version.
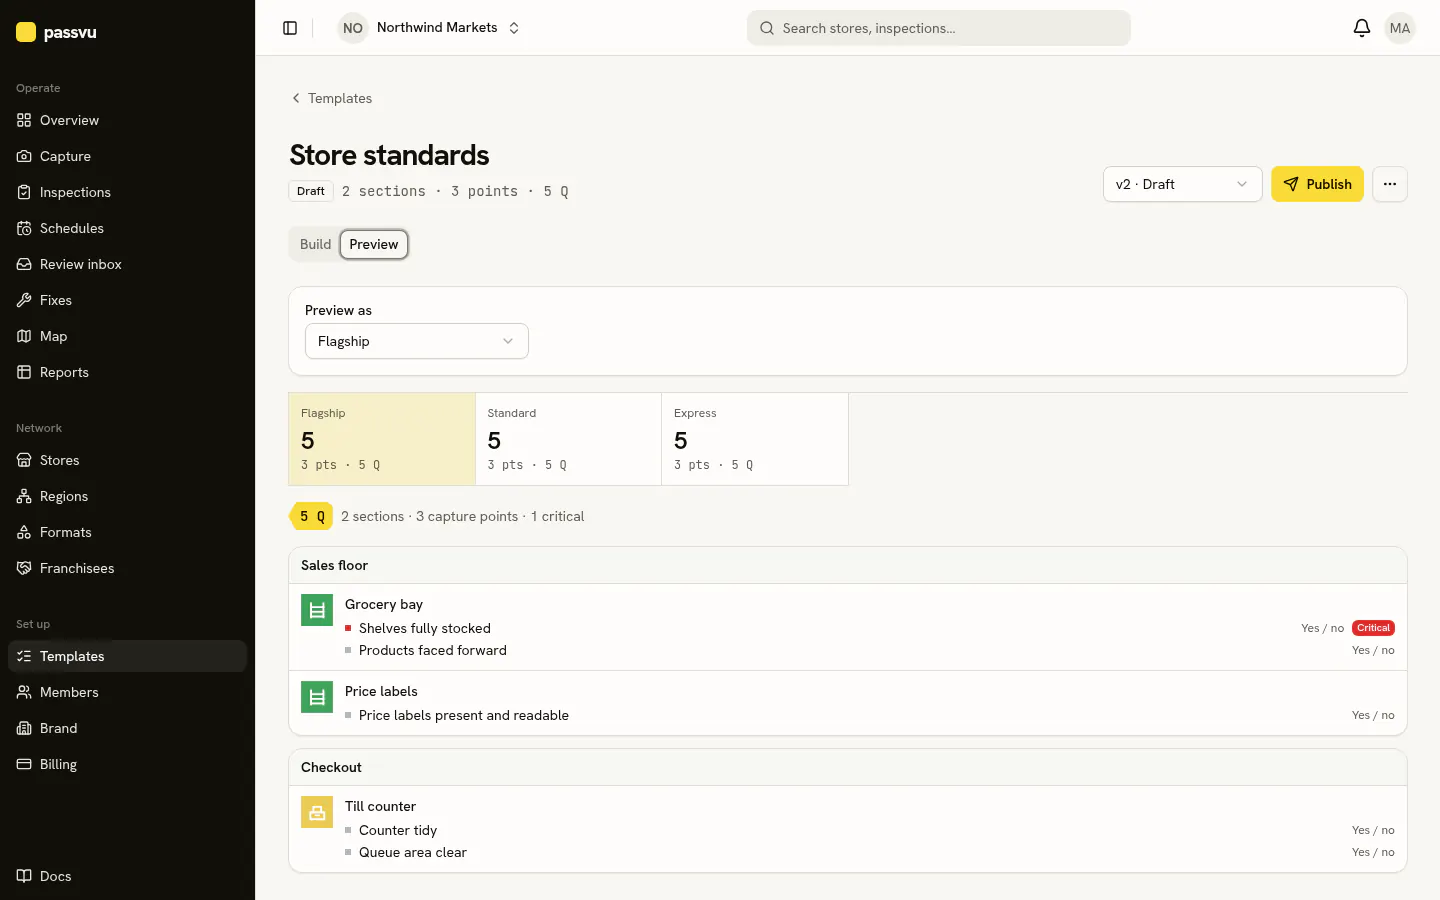
- 1Pick a store type
- 2What that store gets
- 3Every item by store type
Tip: example photos matter
One or two good example photos per spot make results much more accurate.
Last updated on